Managing image embeds with Drupal media
Allowing your content creators to embed images in text fields is a big risk if you don't have the right measures in place to get properly rendered images without jeopardizing your site's performance. We faced this issue first-hand with embedded images due to not using the right configuration and this lead to extremely large images being rendered. In this post I'll go over the techniques I took for addressing those issues and set up a system for image embeds that is solid and performant.
I started by writing a seven-part guide on how to setup responsive images. In this post I'll focus on image embeds. If you followed or read the responsive images guide, you should be able to take advantage of some of the work we did there in this post. The guidelines covered here include:
- Defining requirements
- Image styles
- Media view modes
- Text format configuration
Defining requirements
Before you write the first line of code or set the first drupal configuration for this issue, you need to have a clear understanding of your requirements. Here is a summary of my requirements:
Only certain user roles can embed images
This means we need to figure out if the text formats used in our site will allow us to set the restrictions we need. Otherwise we may need to create or edit a text format for our target user roles.
Users need to be able to choose the image size and aspect ratio when embedding images
We defined the image sizes and aspect ratios and assigned names that were user-friendly for non-technical users. We came up with name options we think our users will find easy to work with such as:
- Small square, Small portrait, Small rectangular
- Medium square, Medium portrait, Medium rectangular, Medium rectangular wide
- Large square, Large rectangular, Large rectangular wide
- Extra large square, Extra large rectangular, Extra large rectangular wide
If no option is selected by users, set a default image size
For the default option when no selection is made by the user, we decided to use the Medium rectangular option. This has an aspect ratio of 3:2 and it measures about 720x480.
Existing Media items need to be available for embedding
This was a tricky one because my original inclination was to create a new Media type so we can isolate all configuration for its view modes and not overpopulate our default Media type. However, this ended up not working for us because when you limit your image embeds to only use a new Media type, you don't get access to any of the media items (images), that have already been uploaded to the Media library using other media types. Ultimately we ended up using Drupal core's Media type, Image, and our dev team had to compromise on having a very busy list of view modes for this media type.
Images need the ability to be cropped wihin the Media page
Since most of our images already provide the ability to be cropped at different aspect ratios, using the core Media type in the previous bullet point made this an easy solution.
Image styles
It all starts with image styles. I'm not going to go over how to create image styles, you can read my post Image styles in Drupal. The one thing I am going to repeat however is the importance of creating reusable image styles. Reusable image styles can help you reduce the number of image styles you create while providing the flexibility you need with each use case.
Image styles are key as each of the size options we defined above translate into image styles. So Small square for example, is an image style that is defined as 1:1 (250px). Medium rectangular would be something like 3:2 (720x480), etc. You may be wondering, how do you plan on using fiendly names for your content editors when your image styles names are not very friendly? Great question. Since we are using Drupal's Media, content editors do not interact directly with image styles, they do with Media view modes and this is where we will use more friendly names.
Media view modes
View modes are one of Drupal's powerful features. Being able to display content is different ways with little effort can turn a simple website into a dynamic content hub. The example I always give when someone asks me what view modes are or how do they work is the Amazon website. When you are viewing a product in amazon.com, or most retail websites for that matter, you will notice that the same product or similar ones appear all over the page but in slightly different ways, with different fields or styles. See the page below for an example.
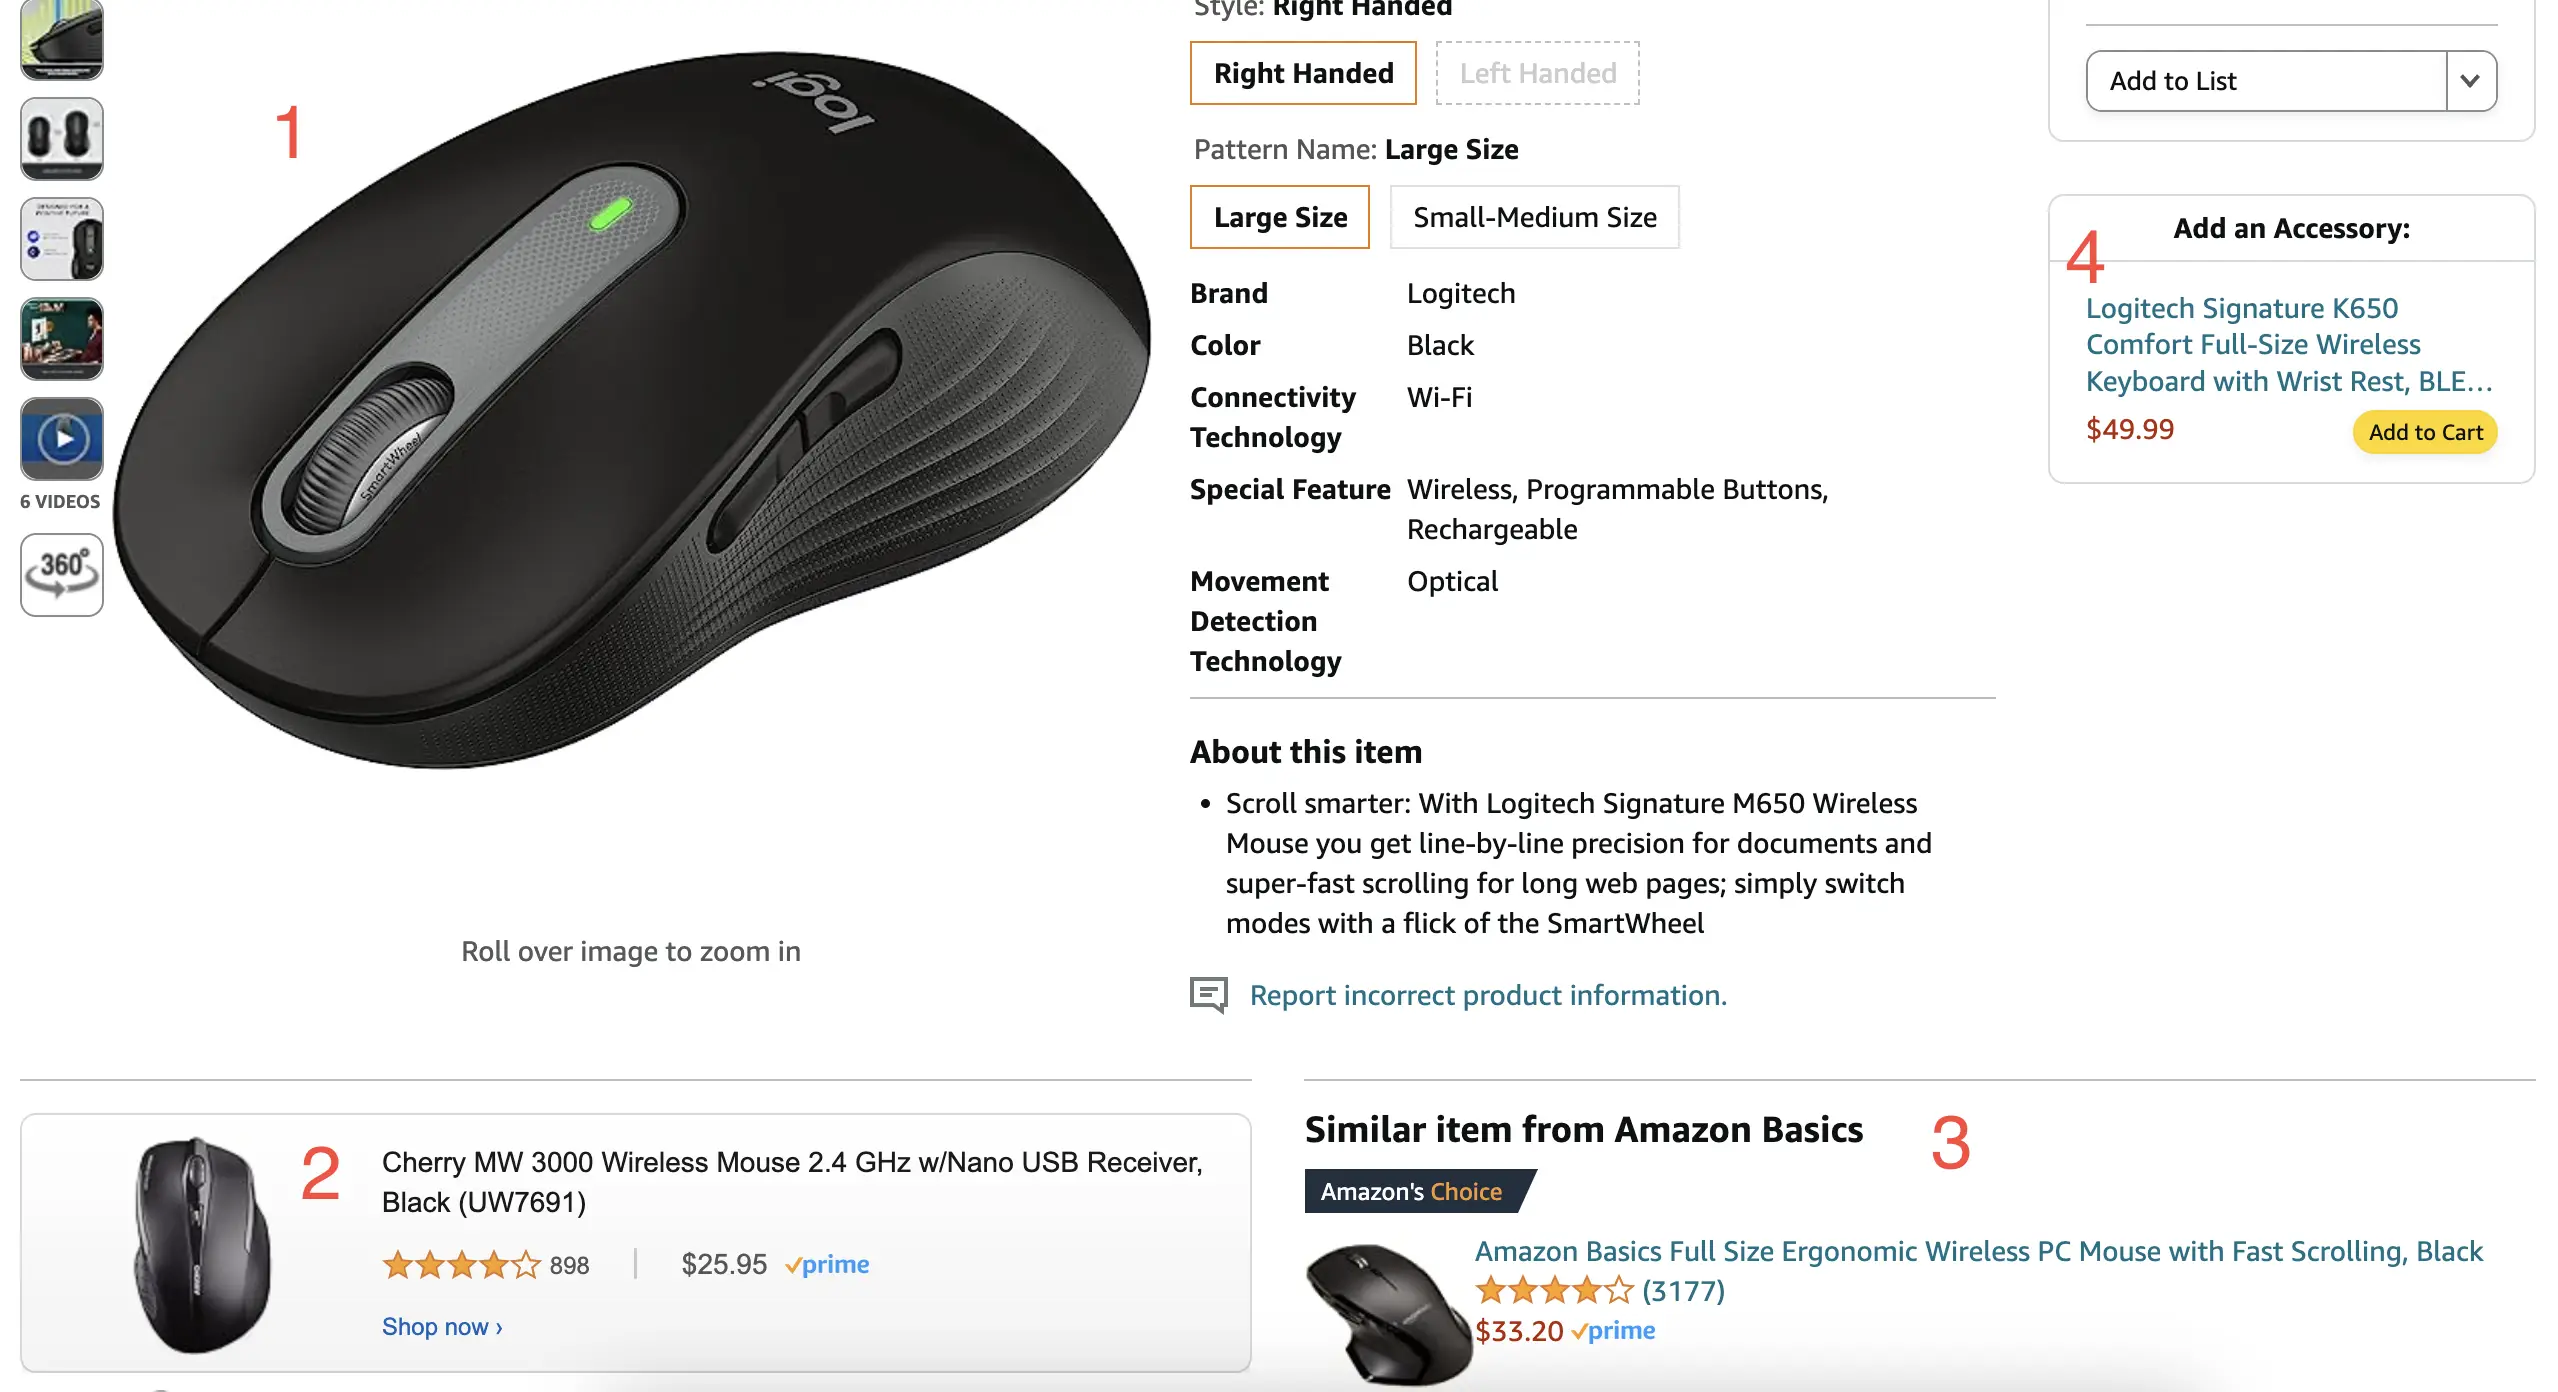
The image above shows many ways in which a product can be displayed. I've numbered each display.
In Drupal, every entity such as content types, media types, blocks, etc., offer the ability to create view modes. For the purpose of image embeds, we will create a Media type view mode for each image style we plan on using. The view modes is what content editors will interact with when choosing an image size or aspect ratio during the image embed process. This is where we will use the user-friendly names we defined earlier. Let's go over how this relationship between view modes and image styles works for image embeds.
Configure view modes for the Image media type
In your Drupal site, create an image style for each image size option you wish to provide to users when embedding images.
Next, create a Media view mode for each image style (
/admin/structure/display-modes/view). Very iimportant: Remember the view mode's label (name) is where we are going to use the friendly name (i.e. Medium rectangular (720x480)). I like to keep the machine name similar to the label so it's easier to debug or identify in code (i.e.medium_rectangular_720x480).Now, let's tie 1 & 2 together:
- Go to the media type you plan on using for media embeds (
/admin/structure/media/manage/image/display). I am using Drupal core's Image media type. - Scroll down and expand the Custom display settings fieldset.
- Check each of the view modes you created in step 2 and click Save.
- Go to the media type you plan on using for media embeds (
Now click each of the view modes and update the image field to use the respective/matching image style.
Configure the text format
View modes and image styles are all configured. Now let's configure the Text format that authorized users will use to embed images.
- Go to the Text formats and editors page (
/admin/config/content/formats) - Click Configure next to the text format you plan on using (i.e. Full HTML)
- Ensure the right user roles are selected
- Within the Toolbar configuration section, drag the Drupal media button from the Available buttons options to the Active toolbar section. You could probably remove the original insert image button since you won't be using it.
- Scroll to the Enabled filters section and check the Embed media checkbox
- Scroll to the Filter settings section and set the following:
Default view mode: This is the default display that will be used if content editors don't pick an option when embedding images. Select any of the view modes that represents the image size you want to use as default.
Media types selectable in the Media Library: Select the Media type you plan on using. In my case is Image.
View modes selectable in the 'Edit media' dialog: Finally, select each of the view modes you created in the previous section. FYI: View modes will be sorted in alpha order by their machine name. In my case I had to prefix some of the machine names with either "a" or "b" so the list of options for the users to choose from would be nicely organized by their label name. See screnshot below.
Click Save configuration
Testing your configuration
Now that we've completed all the configuration we should be able to take it for test drive.
- Go to any page where there is a text field with a WYSIWYG editor
- Make sure you are using the right text format by selecting it at the bottom of the text field where you want to embed an image
- Click the Insert media button from the editor's toolbar
- Select or upload the image you'd like to embed
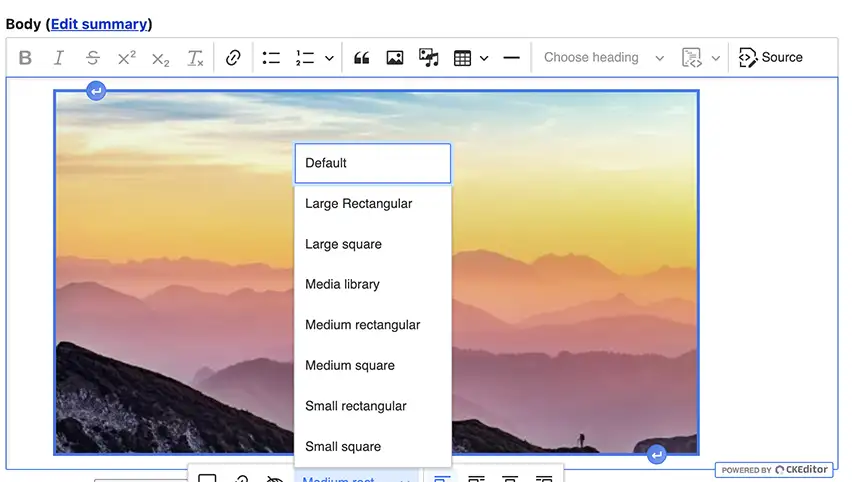
- When the image has been inserted, click on it and you should see several options of actions you can do with the image. Things like align the image, add a caption, link it, and you should also see a selection box listing all the view modes you created.
- After making your selection you should immediately see the image size/aspect ratio change to the one you selected. When you are happy with your selection, click the Save button to save your page.
Important: Depending on your site's configuration, the options for changing your image size may look different than mine. In my case, I am only using Drupal's core modules and this is how the options look for me:
In closing
Putting a system like this for your image embeds will give you the piece of mind that content editors have options to choose how big or small they would like images to be displayed, and from a performance point of view, if your image styles are done properly, you can rest assurred that bloated images will never be rendered because you have put the guard rails in place to avoid this from happening.
I hope you found this article useful and can put these techniques to use in your own Drupal project. Happy New Year! 🎉 🎊 🎆 👋